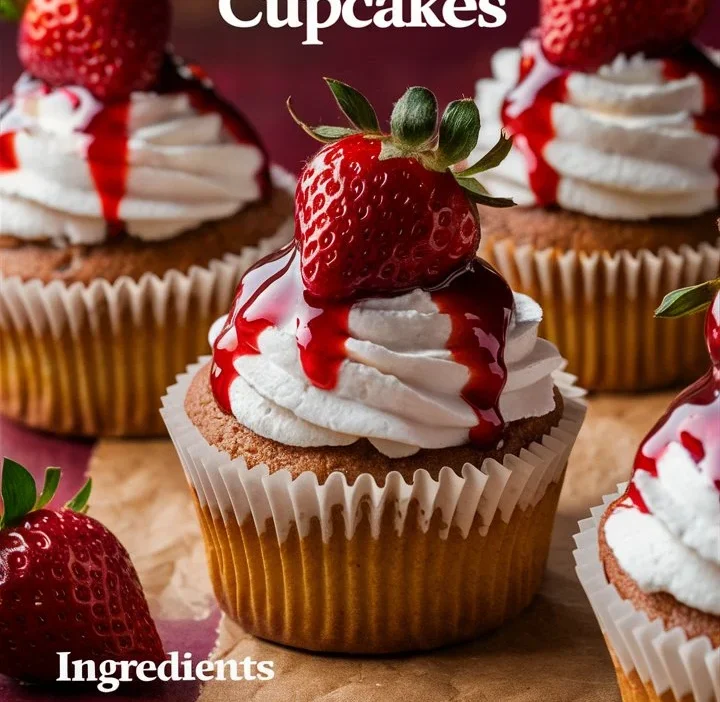
Creamy Strawberry Cheesecake Cupcakes are a delightful fusion of two classic desserts—rich cheesecake and fluffy cupcakes. These bite-sized treats offer the velvety smoothness of cream cheese with the fresh, fruity burst of strawberries. Perfect for birthdays, gatherings, or simply satisfying your sweet cravings, they’re visually stunning and easy to prepare.
In this article, you’ll discover the perfect ingredients, step-by-step instructions, expert tips, and answers to commonly asked questions. Let’s get baking!
🧁 Ingredients Overview
| Ingredient | Quantity | Purpose |
|---|---|---|
| All-purpose flour | 1 cup (120g) | Base for the cupcake batter |
| Granulated sugar | 3/4 cup (150g) + 1/2 cup (100g) | Sweetens batter and filling |
| Baking powder | 1 tsp (5g) | Helps cupcakes rise |
| Eggs | 2 large (room temp) | Adds moisture and binds ingredients |
| Unsalted butter | 1/2 cup (115g) | Adds richness |
| Cream cheese | 8 oz (226g, room temp) | Key ingredient for cheesecake filling |
| Heavy whipping cream | 1/2 cup (120ml) | Makes filling light and creamy |
| Fresh strawberries | 1 cup (150g) | Flavor and garnish |
👩🍳 How to Make Creamy Strawberry Cheesecake Cupcakes
Step 1: Preheat the Oven
- Preheat your oven to 350°F (175°C).
- Line a muffin tin with paper cupcake liners.
Step 2: Make the Cupcake Batter
- In a bowl, whisk together flour, 3/4 cup sugar, baking powder, and a pinch of salt.
- In a separate bowl, beat the butter and eggs until creamy.
- Slowly combine the dry ingredients into the wet mixture.
- Mix until just combined (avoid overmixing).
Step 3: Bake the Cupcakes
- Fill cupcake liners 2/3 of the way with batter.
- Bake for 18–20 minutes or until a toothpick comes out clean.
- Let cool completely on a wire rack.
Step 4: Prepare the Cheesecake Filling
- Beat cream cheese and 1/2 cup sugar until smooth.
- In another bowl, whip the heavy cream until stiff peaks form.
- Fold whipped cream into the cream cheese mixture.
- Stir in finely chopped fresh strawberries.
Step 5: Assemble
- Core each cupcake using a small knife or cupcake corer.
- Fill the center with cheesecake filling.
- Optionally, pipe more filling on top as frosting.
- Garnish with fresh strawberry slices or mint leaves.
🍓 Serving Ideas
- Serve chilled with a side of mixed berries.
- Pair with herbal tea, coffee, or berry smoothies.
- Display on a tiered dessert stand for parties.
🧊 Storage Instructions
- Store cupcakes in an airtight container in the fridge.
- Best consumed within 3–4 days.
- To freeze: Freeze only the cupcake base (unfilled) for up to 1 month.
⚠️ Common Mistakes to Avoid
- Overmixing: Leads to dense cupcakes. Mix just until combined.
- Cold ingredients: Cream cheese and eggs should be at room temperature to avoid lumps.
- Filling warm cupcakes: Always let cupcakes cool before adding cheesecake filling.
- Skipping measurements: Use a scale for dry ingredients for accuracy.
🪄 Expert Tips
- Chill your cheesecake filling for 30 minutes before piping.
- Add lemon zest to the filling for brightness.
- Top with crushed graham crackers for a cheesecake crust effect.
- Use decorative cupcake liners to match the theme of your event.
💡 Creative Variations
- Mixed Berries: Add blueberries or raspberries with strawberries.
- Mini Cupcakes: Make bite-sized versions for parties.
- Gluten-Free Option: Use almond or coconut flour for a unique texture.
❓FAQs
Can I make these cupcakes ahead of time?
Yes, prepare them 1–2 days ahead and store in the fridge.
Can I freeze them?
Freeze the unfilled cupcakes only. Add filling after thawing.
Can I use frozen strawberries?
Yes, thaw them first and drain excess liquid before use.
What makes these different from regular cupcakes?
The creamy cheesecake filling sets them apart, making them extra rich and indulgent.
How do I prevent the filling from cracking?
Don’t overbeat the cream cheese and always use softened ingredients.
🧁 Conclusion
Creamy Strawberry Cheesecake Cupcakes are the ultimate dessert mashup—moist, creamy, fruity, and fun to make. Avoid common baking pitfalls, follow the simple steps, and feel free to get creative with flavors and toppings. Once you make these, they’re bound to become a favorite in your dessert rotation.


